Changing the connectors of 2 In 1 Feedlines is a task that requires precision, knowledge, and the right tools. As a reputable 2 In 1 Feedlines supplier, I understand the importance of this process and am here to guide you through it step by step.
Understanding 2 In 1 Feedlines
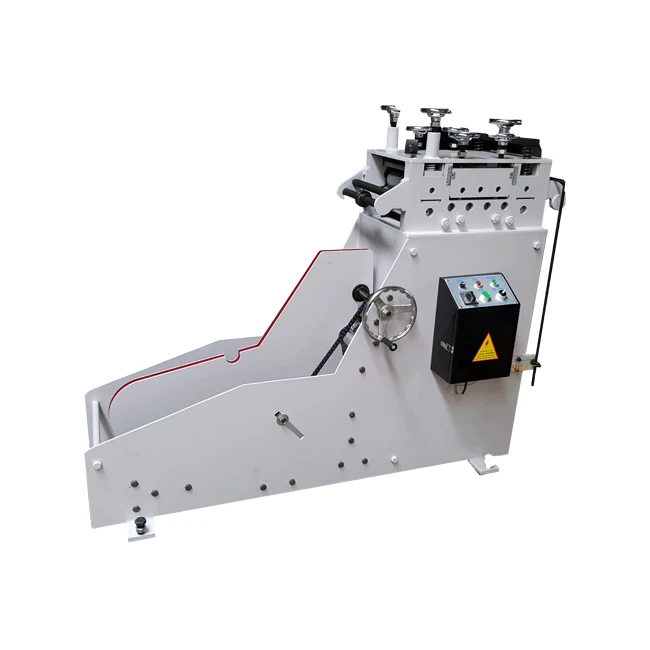
Before delving into the process of changing connectors, it's essential to understand what 2 In 1 Feedlines are. These feedlines are designed to combine two functions into one unit, typically uncoiling and straightening metal coils or strips. They are widely used in industries such as manufacturing, automotive, and construction.
There are different types of 2 In 1 Feedlines available in the market, each with its own features and specifications. For example, the Cradle Uncoiling Combine Straightening is a popular option that offers efficient and reliable performance. Another option is the 2 in 1 De - coiler With Straightener, which is known for its versatility and ease of use. The Coil Strip 0.3 - 3.2mm Decoiler Straightener 2 IN 1 Machine is specifically designed for handling coil strips within a certain thickness range.
Reasons for Changing Connectors
There are several reasons why you might need to change the connectors of 2 In 1 Feedlines. One of the most common reasons is damage to the existing connectors. Over time, connectors can wear out due to constant use, vibration, or exposure to harsh environmental conditions. When connectors are damaged, they can cause problems such as poor signal transmission, electrical shorts, or mechanical failures.
Another reason for changing connectors is to upgrade or modify the feedlines. As technology advances, new types of connectors become available that offer better performance, higher reliability, or improved compatibility with other equipment. By changing the connectors, you can enhance the functionality of your 2 In 1 Feedlines and ensure that they meet the requirements of your specific application.


Tools and Materials Needed
Before you start changing the connectors of 2 In 1 Feedlines, you will need to gather the necessary tools and materials. Here is a list of items that you will typically need:
- Screwdrivers: Different sizes of flat - head and Phillips - head screwdrivers will be required to remove and install the connectors.
- Wire cutters and strippers: These tools are essential for cutting and stripping the wires of the feedlines.
- Connectors: Make sure you have the correct type and size of connectors for your 2 In 1 Feedlines. Match the specifications of the new connectors with the existing feedlines to ensure proper compatibility.
- Electrical tape: Electrical tape can be used to insulate the wires and prevent electrical shorts.
- Heat shrink tubing and heat gun (optional): Heat shrink tubing provides a more professional and secure way of insulating the connections. A heat gun is used to shrink the tubing.
Step - by - Step Guide to Changing Connectors
The following is a step - by - step guide to changing the connectors of 2 In 1 Feedlines:
Step 1: Prepare the Work Area
First, turn off the power to the 2 In 1 Feedlines to prevent any electrical accidents. Place the feedlines on a clean and stable work surface. Make sure you have enough space to work and that all the tools and materials are within reach.
Step 2: Remove the Existing Connectors
Use the appropriate screwdriver to remove the screws that hold the existing connectors in place. Carefully disconnect the wires from the connectors. Take note of the wire connections, such as the color - coding or any markings, to ensure that you can reconnect them correctly later.
Step 3: Prepare the Wires
Use the wire cutters to trim the ends of the wires to remove any damaged or frayed sections. Then, use the wire strippers to remove a small section of the insulation from the ends of the wires. The length of the stripped section should be appropriate for the new connectors.
Step 4: Install the New Connectors
Align the new connectors with the wires and insert the stripped ends of the wires into the appropriate terminals of the connectors. If the connectors have screws, tighten them securely to ensure a good electrical and mechanical connection. If the new connectors use a different type of connection method, such as crimping, follow the manufacturer's instructions carefully.
Step 5: Insulate the Connections
Once the wires are connected to the new connectors, use electrical tape to wrap around the connections. Make sure the tape covers the exposed wires completely to prevent electrical shorts. If you are using heat shrink tubing, slide the tubing over the connection and use a heat gun to shrink it. The heat shrink tubing will provide a more durable and professional - looking insulation.
Step 6: Reinstall the Connectors
Align the new connectors with the housing of the 2 In 1 Feedlines and use the screwdriver to install the screws. Make sure the connectors are firmly in place.
Step 7: Test the Feedlines
After installing the new connectors, turn on the power to the 2 In 1 Feedlines. Check for any signs of abnormal operation, such as unusual noises, sparks, or poor performance. If everything appears to be working correctly, you have successfully changed the connectors.
Tips and Precautions
- Safety first: Always wear appropriate safety gear, such as gloves and safety glasses, when working with electrical equipment.
- Follow the manual: Refer to the manufacturer's manual for your 2 In 1 Feedlines and the new connectors. The manual will provide specific instructions and guidelines that are relevant to your equipment.
- Quality control: When selecting new connectors, choose high - quality products from reputable manufacturers. Poor - quality connectors can lead to problems and may even damage your feedlines.
- Keep records: Keep a record of the connector replacement, including the date, the type of connectors used, and any observations or issues during the process. This record can be useful for future maintenance and troubleshooting.
Conclusion
Changing the connectors of 2 In 1 Feedlines is a manageable task if you have the right knowledge, tools, and patience. By following the steps outlined in this guide, you can ensure that the process is carried out safely and effectively. As a 2 In 1 Feedlines supplier, I am committed to providing you with high - quality feedlines and the support you need to maintain and upgrade your equipment.
If you are interested in purchasing 2 In 1 Feedlines or have any questions about changing connectors, please don't hesitate to contact us for further discussion. Our team of experts is always ready to assist you with your procurement needs.
References
- Manufacturer's manuals for 2 In 1 Feedlines and connectors.
- Industry standards and best practices for electrical connections.